Citrix Web Interface for Citrix XenAppのインストール方法
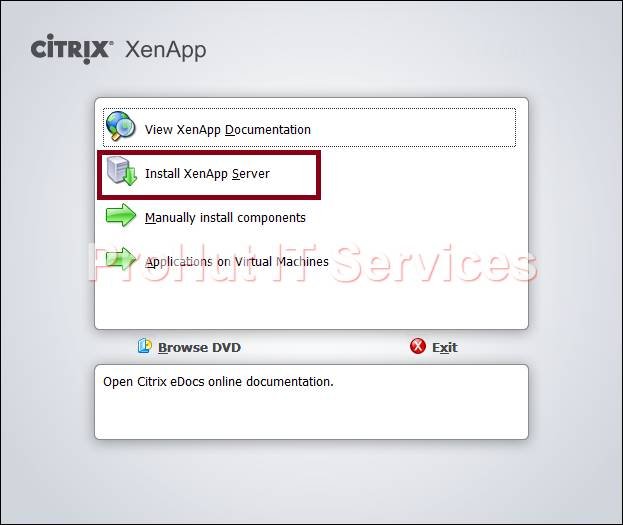
Citrix Web Interfaceは、エンドユーザーがアプリケーションにアクセ Web Interfaceは、Citrix XenApp Servicesをホストするサーバーと同じサーバーにインストールすることも、別のサーバーにインストールすることもできます。 環境が大きい場合は、サーバーに余分な負荷を追加しないため、別のサーバーにWebインターフェイスをインストールすることをお勧めします。 Web Interfaceをインストールするには、Citrix XenApp6のDVDを挿入します。5と自動インストールを実行します。
1. ウィザードが起動し、”XenApp Serverのインストール”を選択します。
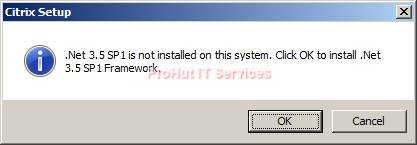
2. Webインターフェイスをインストールするには、Dot Net3.5SP1が必要です。 [OK]をクリックして、.Net3.5を自動的にインストールします。 Dot Net3.5SP1をインストールした後、サーバーを再起動します。
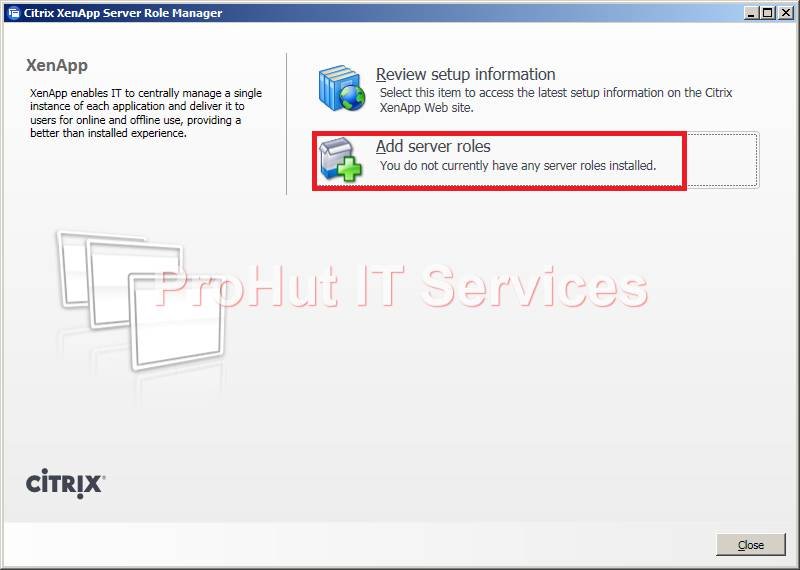
3. Citrix XenAppサーバーロールマネージャウィンドウで。 [サーバーの役割の追加]をクリックして、[役割]を選択します。
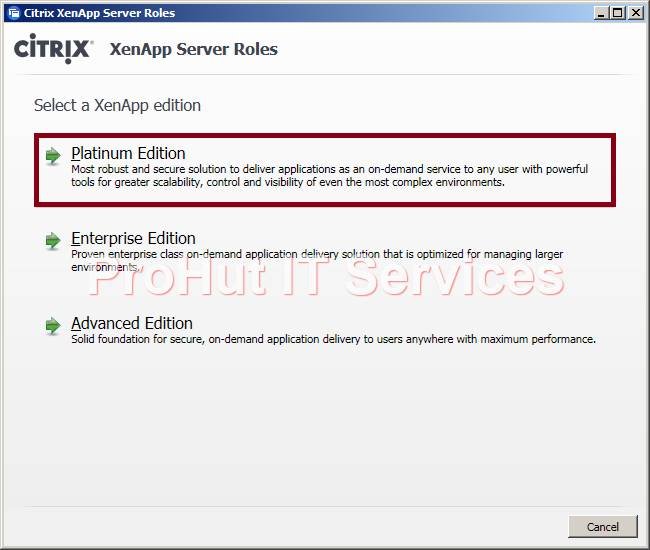
4. 会社が購入したCitrixライセンスに応じて、XenApp editionを選択します。 この実用的では、Platinum Editionを選択してインストールを開始します。
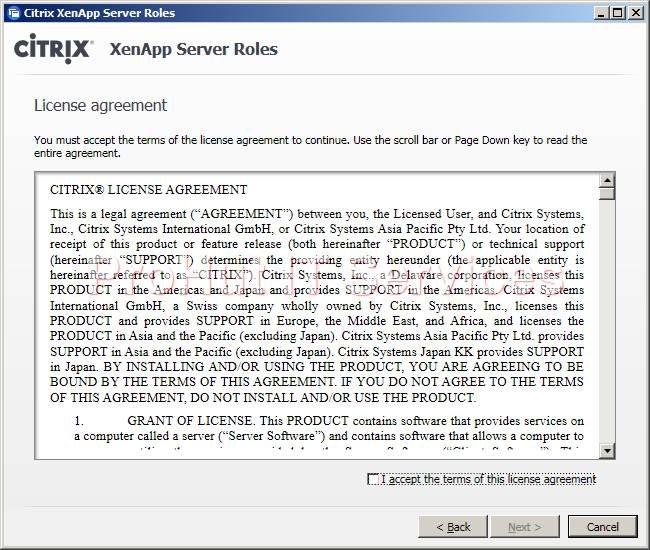
5. “使用許諾契約書”ウィンドウで、Citrix使用許諾契約書を読み、契約書を選択して”次へ”をクリックします。
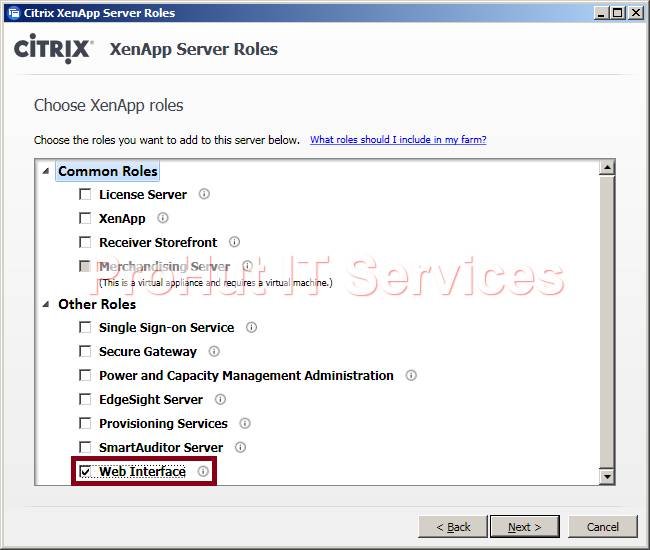
6. “Webインターフェース”を選択し、”次へ”をクリックします。
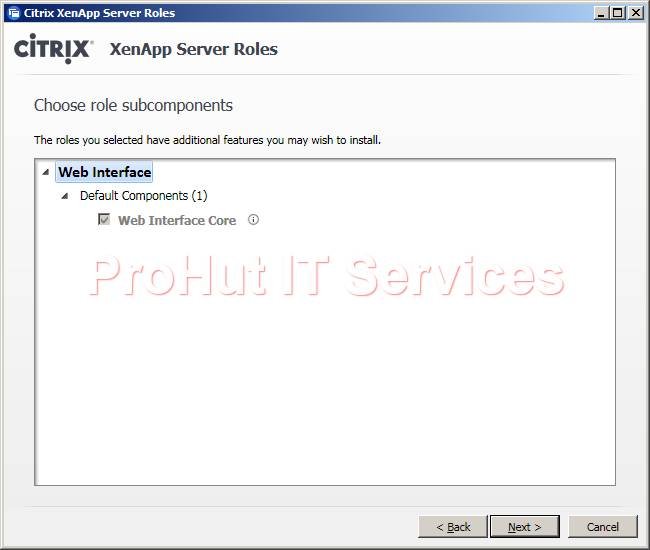
7. “次へ”をクリックしてインストールを開始します。
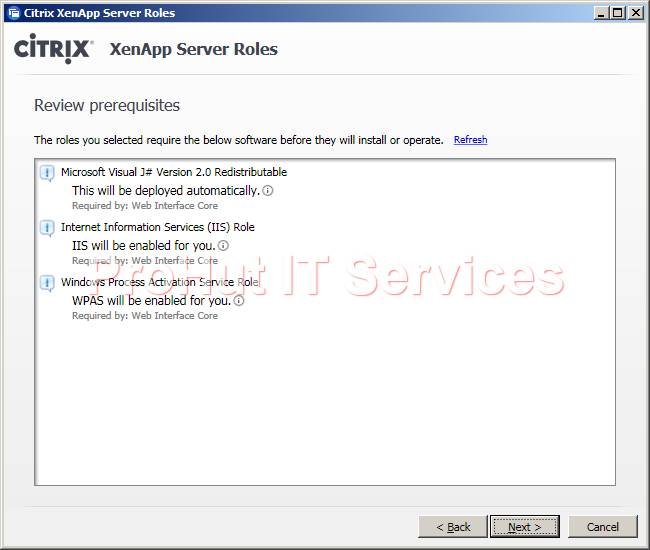
8. [前提条件の確認]ページで、[次へ]をクリックします。
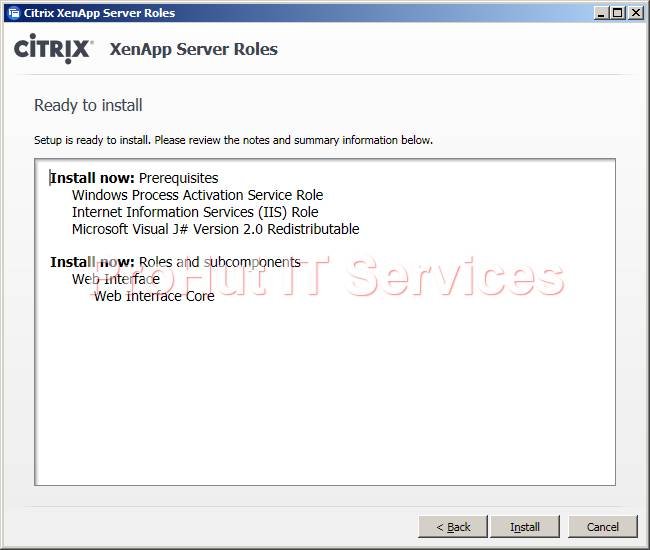
9. [Ready to Install]ページで、インストールするために選択したすべての役割と機能を確認します。 変更があった場合は、[戻る]をクリックして変更を行います。 「インストール」をクリックして、Web Interfaceのインストールを開始します。
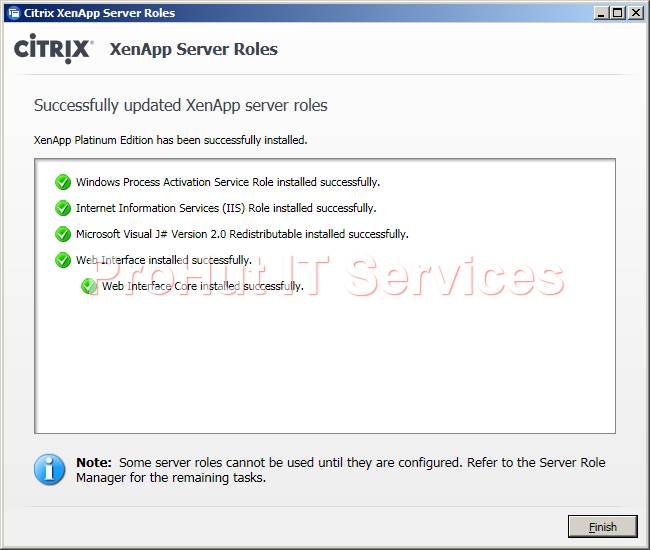
10. Web Interfaceが正常にインストールされている場合は、以下の画像が表示されます。
11. また、Citrix Web Interfaceを構成する手順を確認することもできます。